
www.finescrollsaw.com
Security box
|
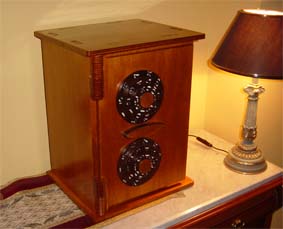
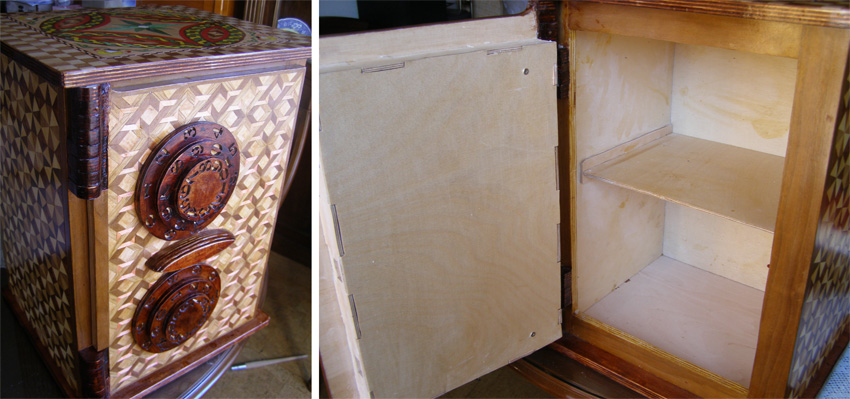
In this section I show you more pictures of the Security Box along with several pictures taken during its construction. These pictures do not intend to be an exhaustive account or complete instructions, just some comments that can be of interest. The particularity of this security box is that it is entirely made with wood, including the hinges and the lock mechanism. The wheels make for 1.000.000 possible combinations and only one opens the box. Precision cutting and assembling is of utmost importance in this pattern. The computer design pattern is perfectly accurate but minor mistakes can ruin the hinges or the rotating wheels mechanism. |
 |
 |
 |
|
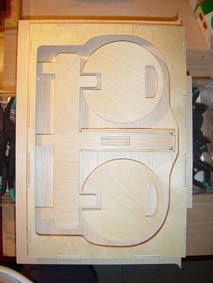
The beginning is as always, transferring the patterns to the wood covered with masking tape and scrolling the pieces. It is essential to check all the pieces all the time, as they are cut and as they are coated. |
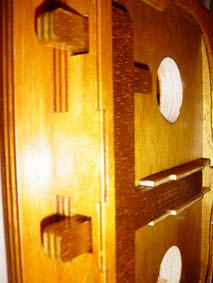
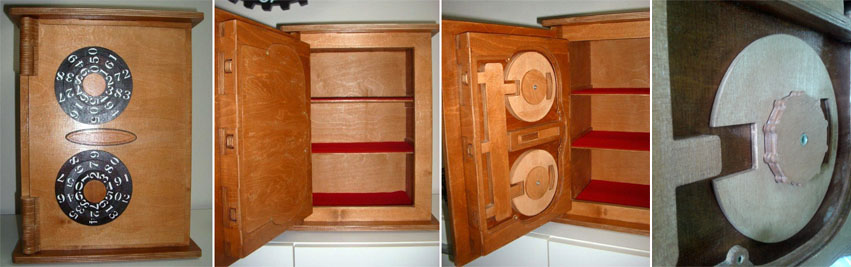
We check that the wooden hinges work properly and that the door fits correctly. |
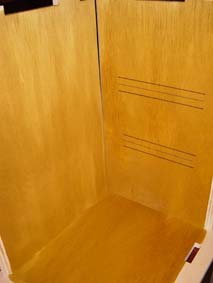
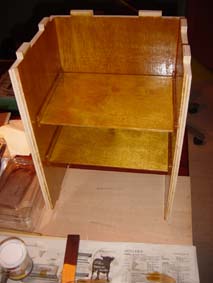
Mounting the shelves requires attention, since they do not have slots (these would make the sides of the box ugly). The position of the shelves is drawn in the sides of the box, being sure those lines will be covered. |
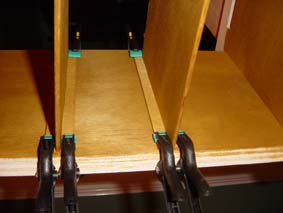 |
The shelves are then glued to one of the sides and left to dry. |
 |
 |
 |
|
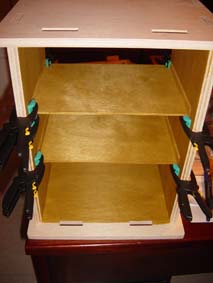
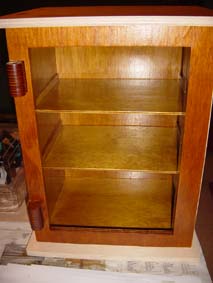
After some time the shelves are glued to the other side and hold in position with clamps. The base and top of the box are encased (but not glued!) so that the shelves dry exactly as they will be when the box is finished. |
Once the shelves have dried the back of the box is glued in position, also encasing the base and top as before. The interior is then finished, in this case with oak dye, wood sealer and several coats of satin varnish. |
The front of the box is then glued in position and also finished. The top and base will be glued at the very end so the finishing of these pieces and the other sides can be left for the end. |
 |
 |
|
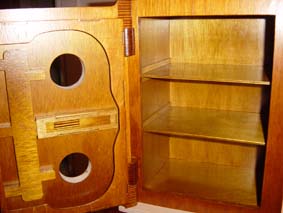
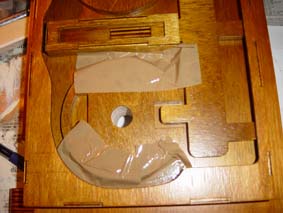
Again we check that the locking mechanism works fine (the wheels will be installed later). |
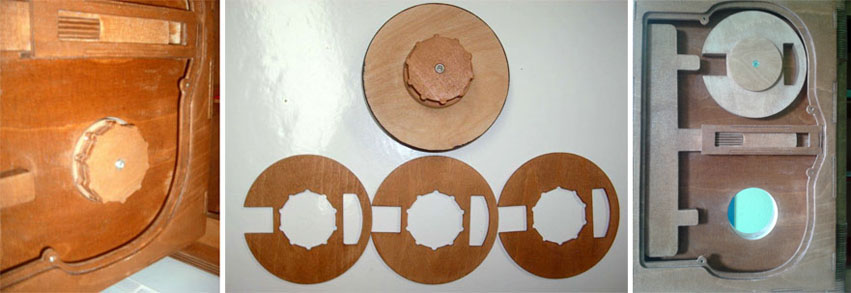
The only problem I found is with the hollow rods of the mechanism, they are slightly shorter than necessary. This happens because the thickness of the wood can have small variations. This minor problem has an easy solution, it is enough to cut one more piece for the rods in a thin wood (1,5 mm in this case), glue it and to sand until getting the exact length needed. |
 |
After all the care with the precision the results looks good and the pieces fit really well. |
 |
 |
|
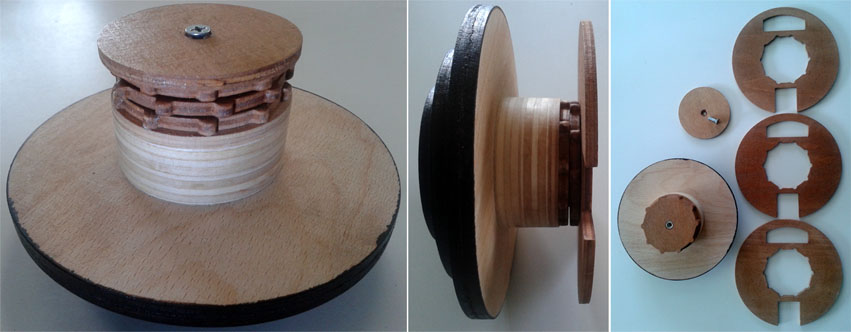
To install the rotating wheels, the backside ones are kept in opening position with masking tape and then the numbered ones are glued in position with the chosen combination. |
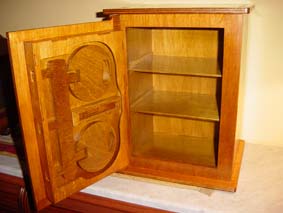
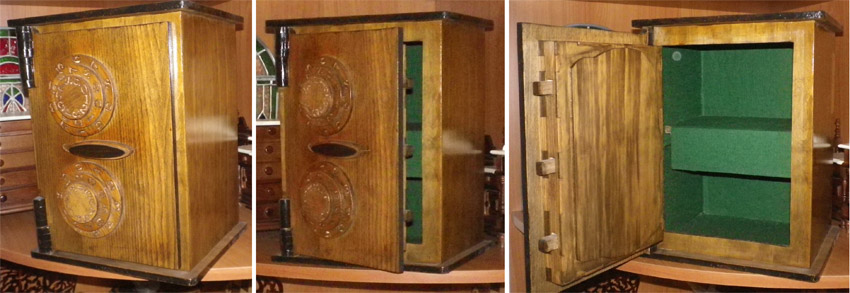
We are done. Remember that the final step is to mount the door and then to glue the base and the top. This is the aspect of the box open, showing the mechanisms and the interior. It is also possible to hide all mechanisms by simply not making the inner cut of the rear piece of the door. |
 |
 |
 |
|
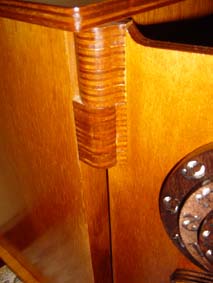
Detail of one of the hinges. |
Detail of the closing mechanism. |
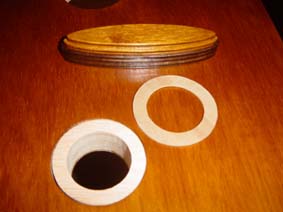
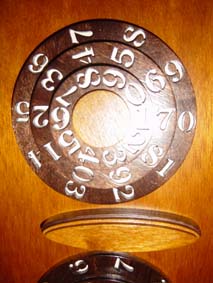
Detail of the numbered wheels. |
 |
The pattern of the security box is printed to make the box with 1/8 and 3/8 inches wood, but of course it can be resized at will. This table gives the measures of the box depending on the wood thickness you use:
Please note that this pattern is registered and copyrighted. If you would like to have it I offer it for 16 € plus shipping. The pattern is computer made, which provides total precision, and nicely printed for convenient scrolling. Click here to buy this pattern. Write me to info@finescrollsaw.com for any questions. |
||||||||||||||||||||
|
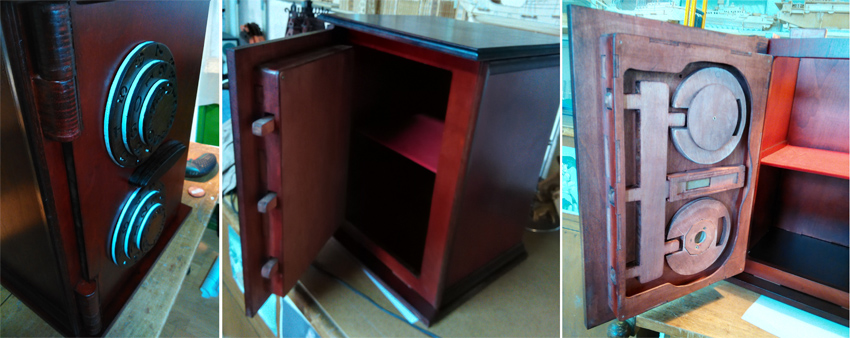
The final result looks impressive. I have increased the pattern size to 126% and used 4 and 12 mm wood, giving a height of 42 cm and a width of 32 cm. |
 |
|
These pictures have been kindly sent by Markus Hewera from Germany. He has modified the pattern so that in his model it is possible to change the combination of the vault. The system to do so can be seen in the images below. |
 |
 |
 |
| This picture has been sent by Juan Chaves from Guadalcanal, Sevilla, Spain. |
 |
| This picture has been kindly sent by Jose Antonio Mateos from Valladolid, Spain. |
 |
| These pictures have kindly been sent by Jesus Herrero from La Virgen del Camino, Leon, Spain. |
|
Site Map General: Home - Scroll saw examples - Free patterns 1 - Free patterns 2 - Free patterns 3 - Patterns for sale - Historical books - Shopping recommendations - Hegner review - Questions and answers - Links Scroll saw tutorials: Medusa box - Security box - Egg clock - Eiffel Tower - Sun clock - Washington box This site uses the cookies Doubleclick, Statcounter and Google Adsense to improve the user experience. You can delete these and all other cookies or to block its use from the options menu of your browser. Cookies are harmless text files used by all web sites. |